Sending a form to recipients
Initially, there are two different ways to assign a form to a user; open (the recipient chooses the primary object himself) or controlled (the administrator chooses which primary object the recipient should fill in for). These two different ways are handled under two views in the recipient's tab.
Views in the Recipients tab
Views in the Recipients tab
Recipients: to assign and manage all open forms, as well as to see all recipients, their status, and other relevant information.
Objects: for assignment of forms directed to a specific object, e.g. a specific course.
Open Form
Open Form
If you choose Open assignment, the form is not tied to any specific object. However, if an object type has been selected under the Select primary object form settings, a user with Open Assignment will themselves be able to select an object
The advantages of Open Assignment are that you do not need to know which person should submit a form for which item (for example course), but you can let the user figure it out himself.
The disadvantages are, on the other hand, that it becomes more difficult to keep track of which objects for which schedule data has been collected, and that forms where a specific "main object" has not been selected by the user are more difficult to use for automatic scheduling in TE Preferences in TE Core .
Add recipients of open forms
At the far right, you can choose to add recipients of the form, this can be done in several different ways.
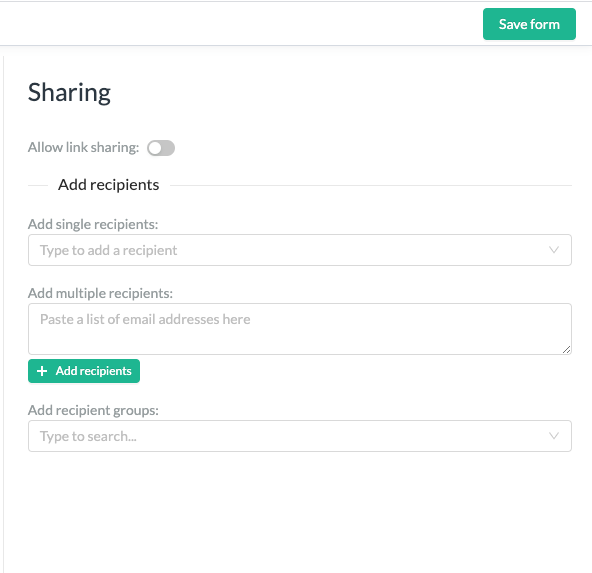
- Sharing: by clicking on "Allow link sharing" you will automatically receive a link that can be shared with the people concerned.
- Add single recipient: add individual email addresses and click enter. Recipients that have been used before will appear as automatic suggestions.
- Add multiple recipients: add more recipients by entering several email addresses one after the other with a space or comma between each email address. Alternatively, upload a list of email addresses from excel by cutting and pasting.
- Add recipient group: You can create groups of recipients to simplify the process.
By creating groups of recipients, you can assign one or more objects to such a group. For example, one could choose that all courses at Law should be assigned to a group of recipients, where the participants in that group can themselves decide who should fill in which form. To add a recipient group, select the “group icon” in the left menu and click “Create new group”.
ATTENTION! It is only when you click the "send form" button in the top right corner that the form is actually sent out to your recipients.

Recipients - view
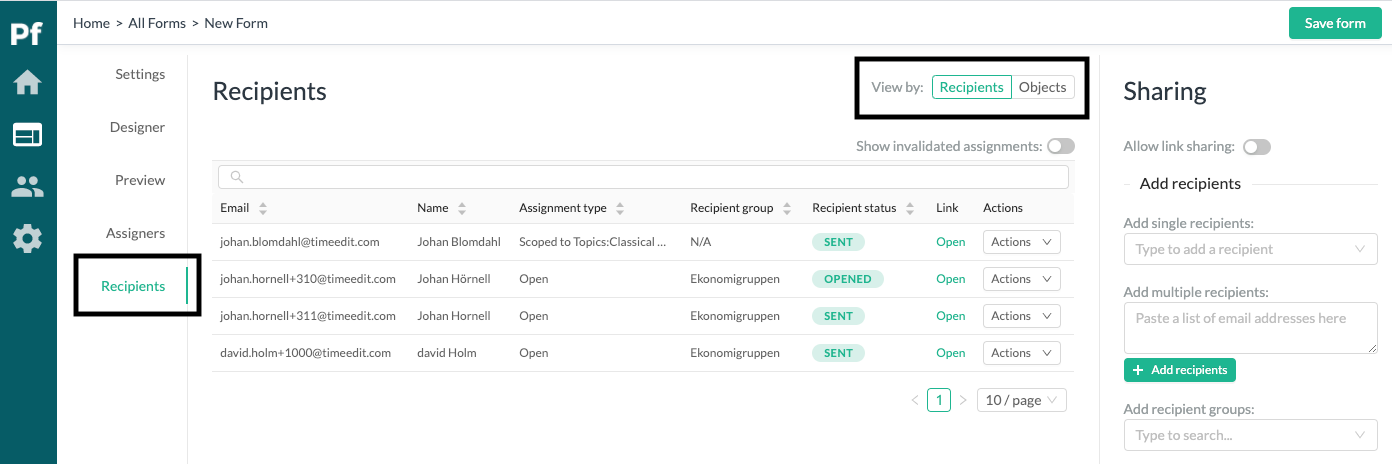
In addition to assigning forms, you have an overview of all recipients who received the form.

On this tab you can:
- See which recipient it is (email and name).
- Which assignment type was used (open or scoped, further explanation below).
- What status the recipient has (Not saved, Sent, Opened, Draft, Submitted, Overdue).
- See which link the recipient has to their form.
- Under the action column and depending on the status: remove the recipient and remind the recipient.
If a recipient is assigned a form with Open Assignment, but then selects a specific item when filling it out, the "Assignment type" column will show the item the recipient has selected, just like a regular scoped assignment
Controlled Form
Controlled Form
When you assign forms with scoped assignment, you start from a list of objects, which in turn depend on which object type you have chosen in the form settings. In the example below, the object is coursename.
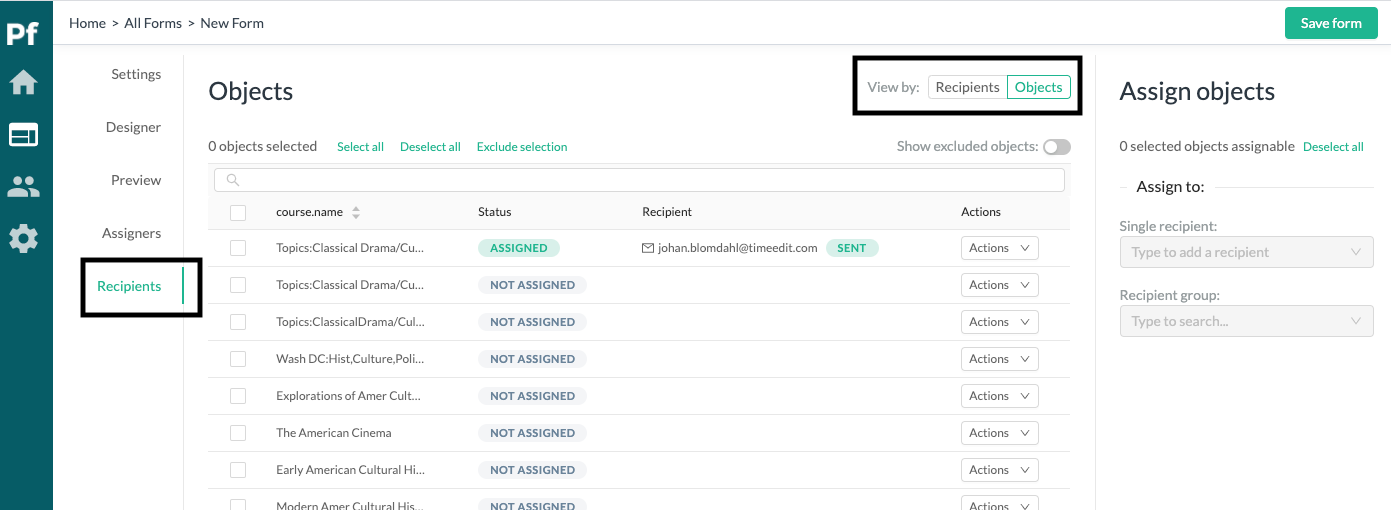
You can then - for each object - choose to:
- Exclude the object from the form (by clicking on actions and "exclude object")
- Assign the object to a recipient, by selecting the line with the object (the course in this example) and then adding recipient in the far right field “Assign objects”.
- In the same way as in Open Assignment, an auto complete dropdown will appear with previously saved recipients
The advantages of Scoped Object are that you can easily create an overview of which objects you want to include schedule documents for, and in this way you can easily keep track on what the status looks like, and which people you have to remind.
The disadvantages is that it requires a little more manual work to get all the forms out for all items, and that you may not know exactly which people are responsible for exactly which item, or that there may be several people who could submit for a certain item .
Uploading Bulk Recipients - Controlled Forms
Uploading Bulk Recipients - Controlled Forms
We understand that manually adding recipients to controlled forms can be time consuming as such we have build the ability to build upload recipients.
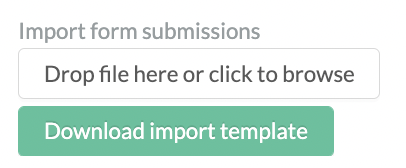
Download the Bulk Recipient Upload Template
To do this simply go to either the recipient or object tab and click "download import template"
Prepare the recipients
To prepare the recipients you must provide the email address, a name and the Primary Object external id on the submissions sheet in the excel spreadsheet.
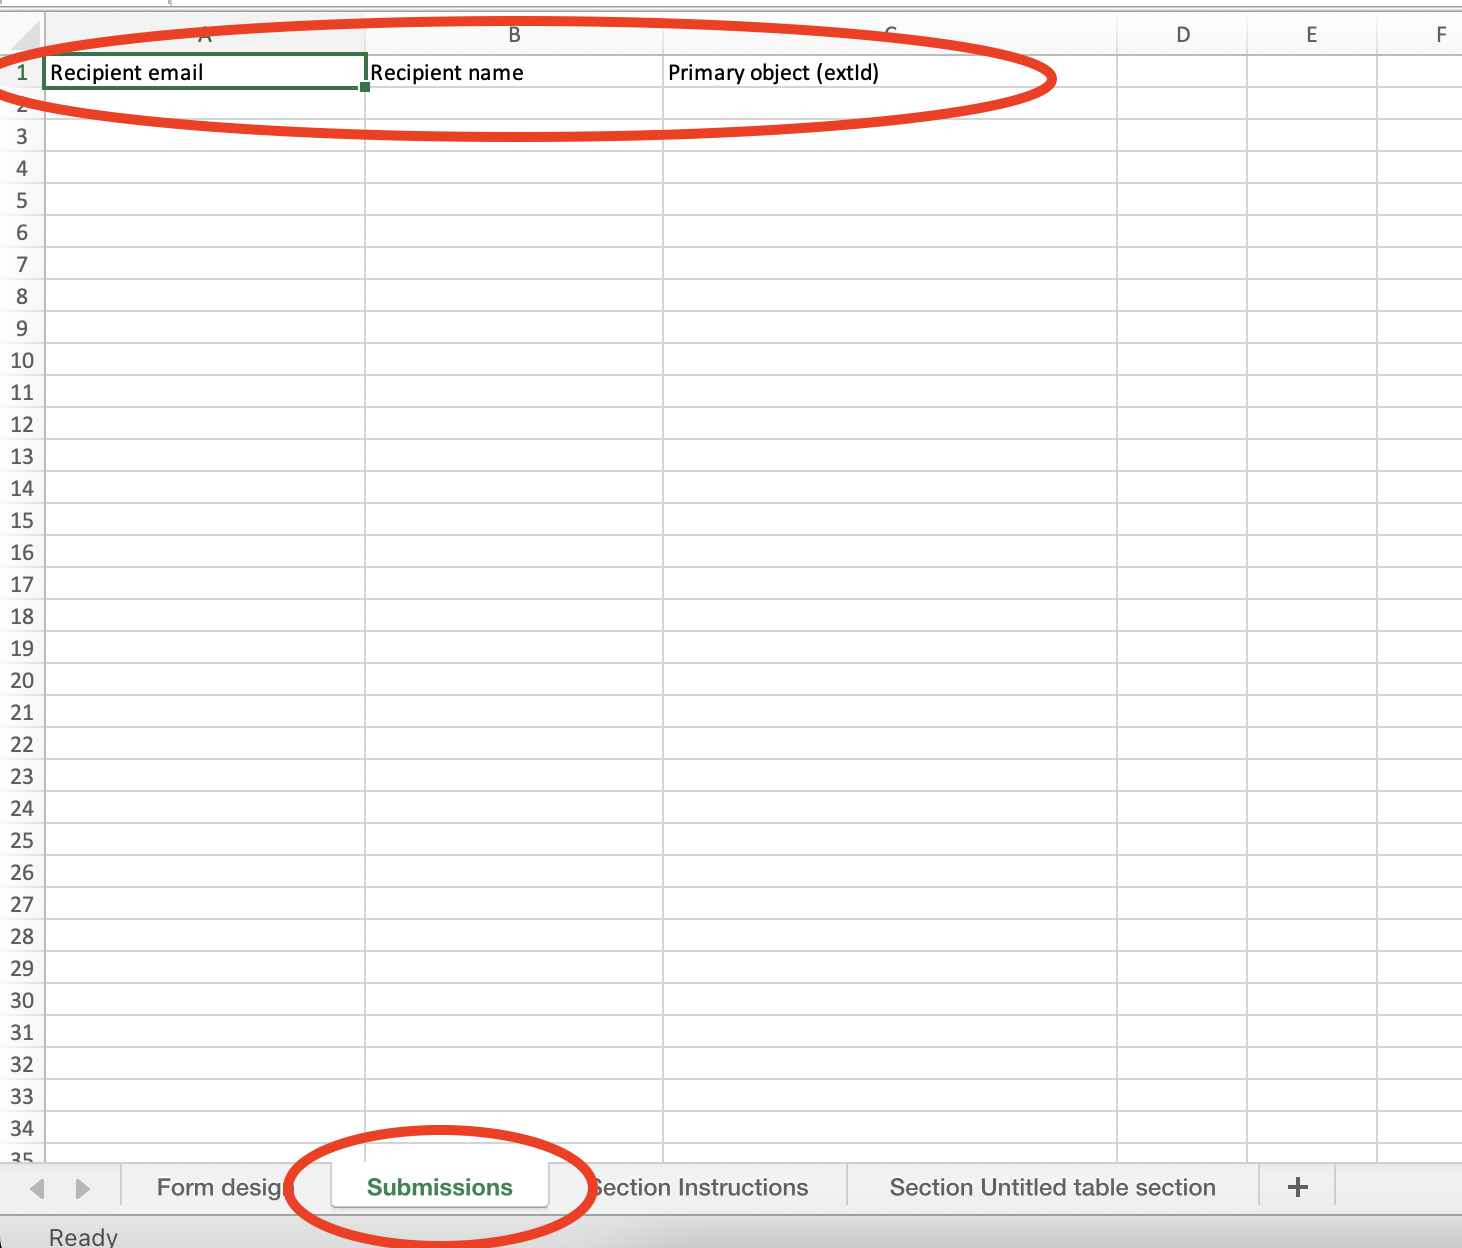
Save the file somewhere you can locate it.
ATTENTION! all other sheets and their data are required to correctly upload the form.
Upload the file
To upload the file - select the "drop file here or click to browse" button

and import the file
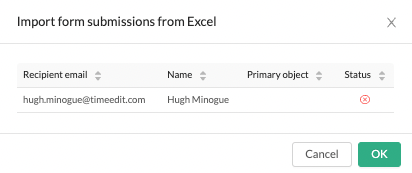
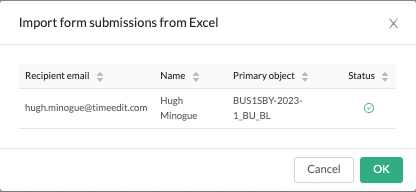
If you don't have any errors you will see a green tick in the status column.
Hints and Tips
Hints and Tips
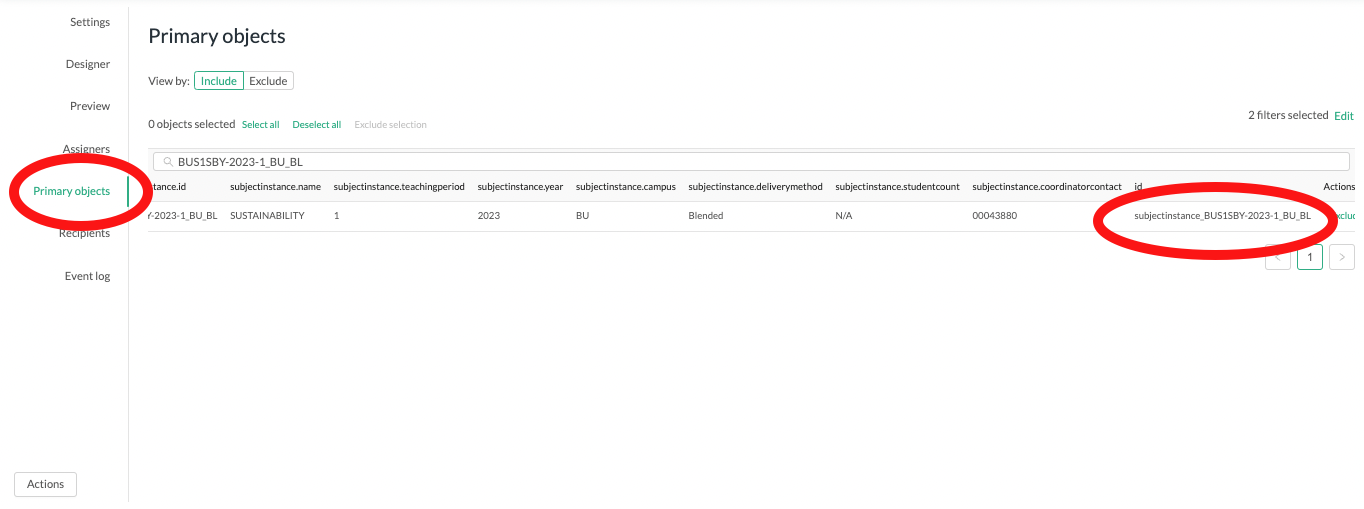
Primary Object External ID
The Primary Object External ID can be found in TE Core, on the Primary Object page of the TE Preference Form or Java Client.
Errors upload the bulk recipient uploader
A cross will occur if the primary object is unable to be located.
