All guides & tutorials
in this lesson
1
In this video tutorial we look at:
2
Key steps:
3
Check out our other videos in the series:
4
5
6
7
8
9
10
11
share
Creating Views in Core
In this video tutorial we look how you can create different kinds of Views in Core

Requirements
In this video tutorial we look at:
- Default View
- Changing days/hours
- Saving Views
- Sharing Views
- Flipping the axis
- Add Lists
- Wekday View
- Adding Objects to Headers
- Splitting the Calendars
- Settings
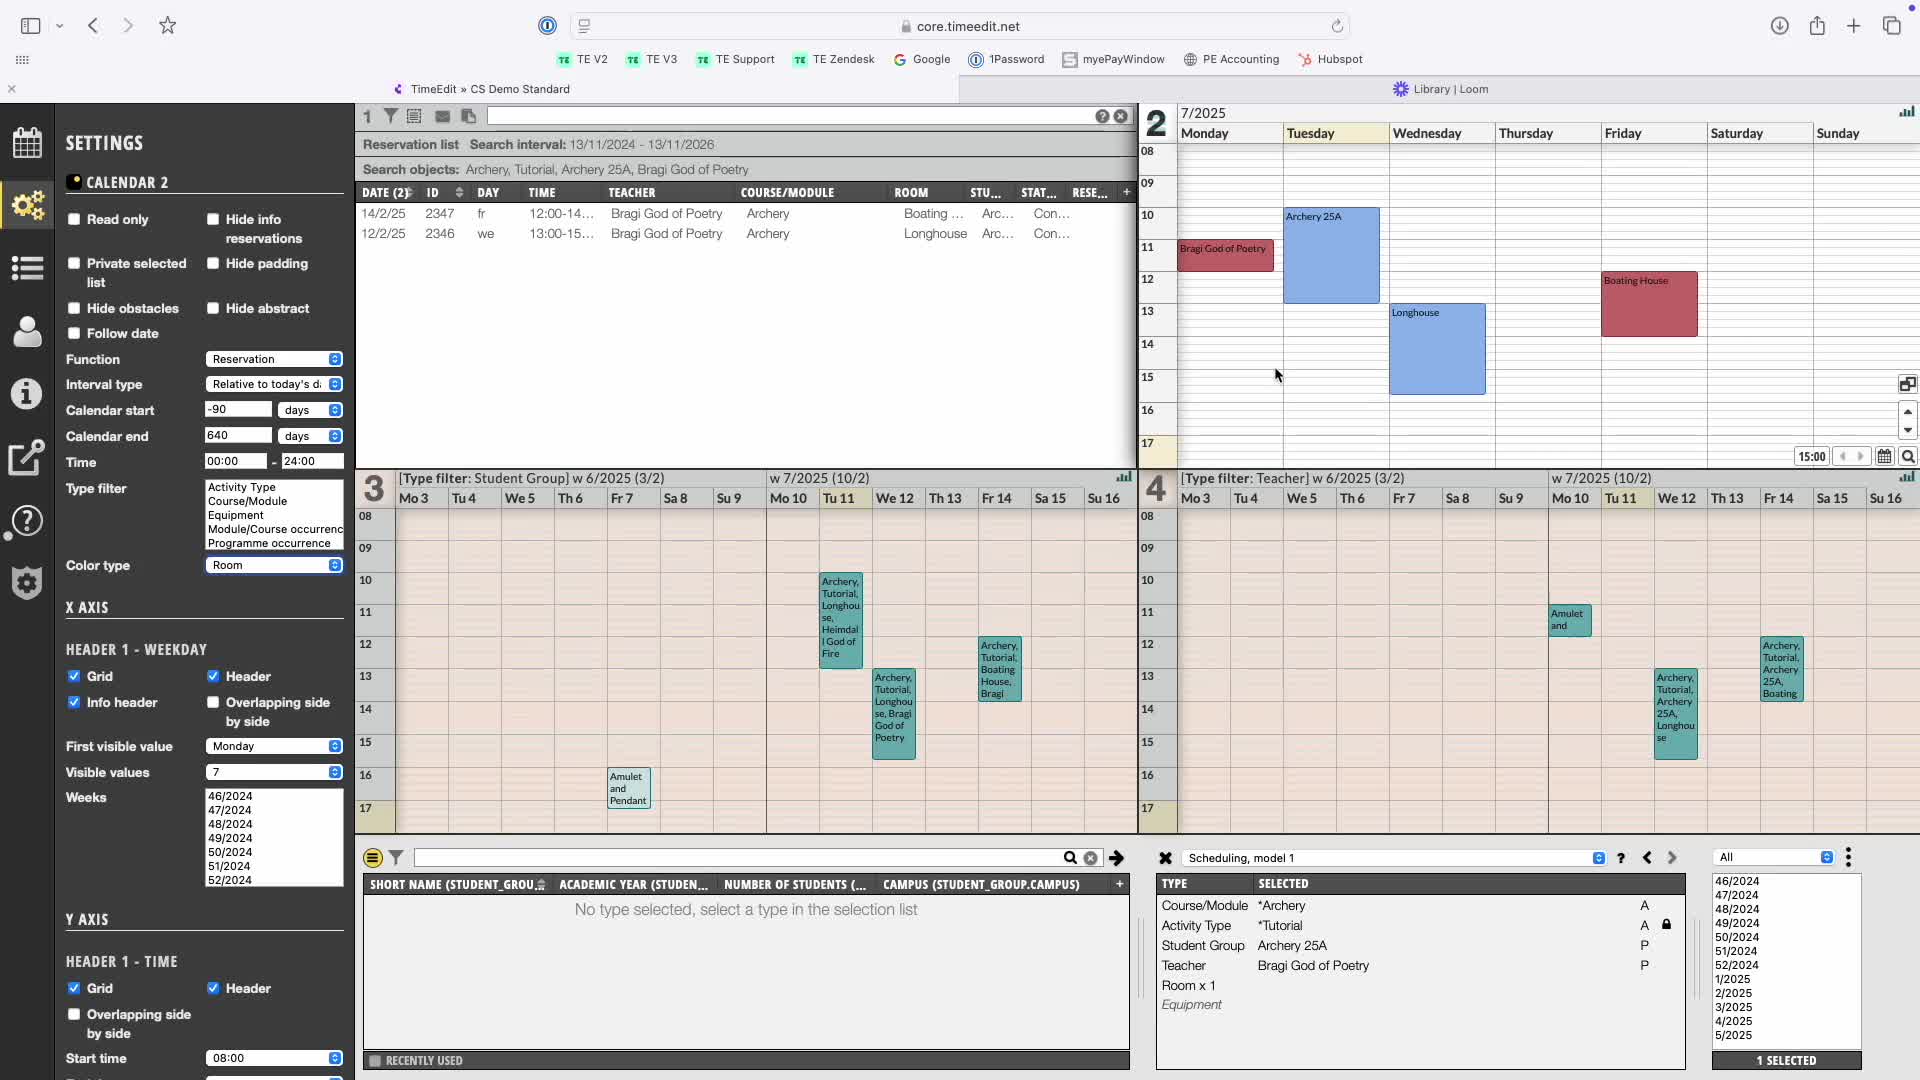
Key steps:
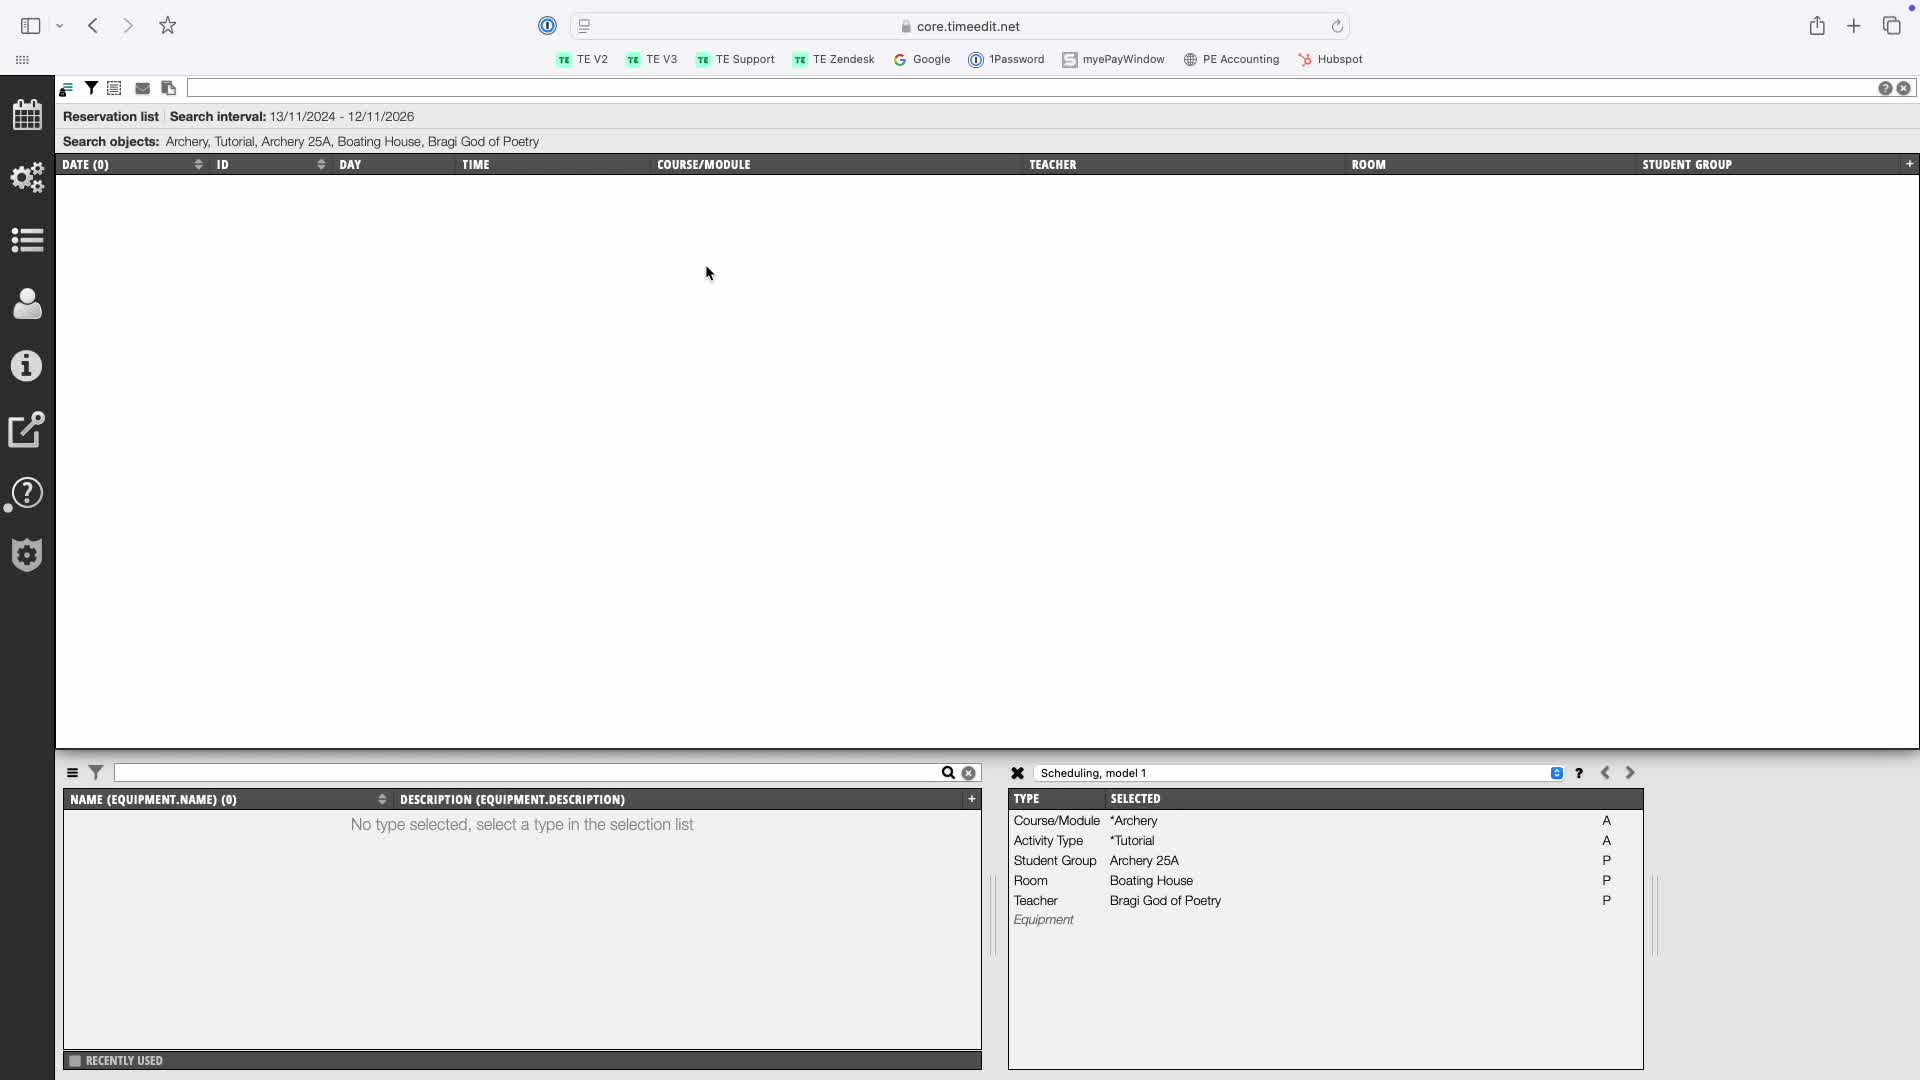
1. Understanding the Default Calendar View 0:11

- The default view displays a standard calendar layout.
- Dates are on the x-axis and times on the y-axis.
- To return to this view, click 'Views' and select 'default'.
2. Creating and Saving New Views 0:32

- Make simple changes using drag and drop to adjust the number of days and visible hours.
- Save the altered view through the 'Views' menu.
- Depending on access privileges, share the view with colleagues.
3. Accessing Additional Options 1:06

- Right-click the hamburger icon in the top left for more options:
- Flip the access to display time across the top and days down the side.
- Change the calendar into a list (e.g., cancellation or reservation list).
4. Modifying List Views 1:31
- Customize the list view by:
- Adding or removing columns.
- Changing column order using drag and drop.
5. Modifying Calendar Headers 1:44
- Right-click the top header to modify it.
- Choose 'weekday view' to make cluster reservations spanning multiple weeks.
6. Dragging Objects into Headers 1:59
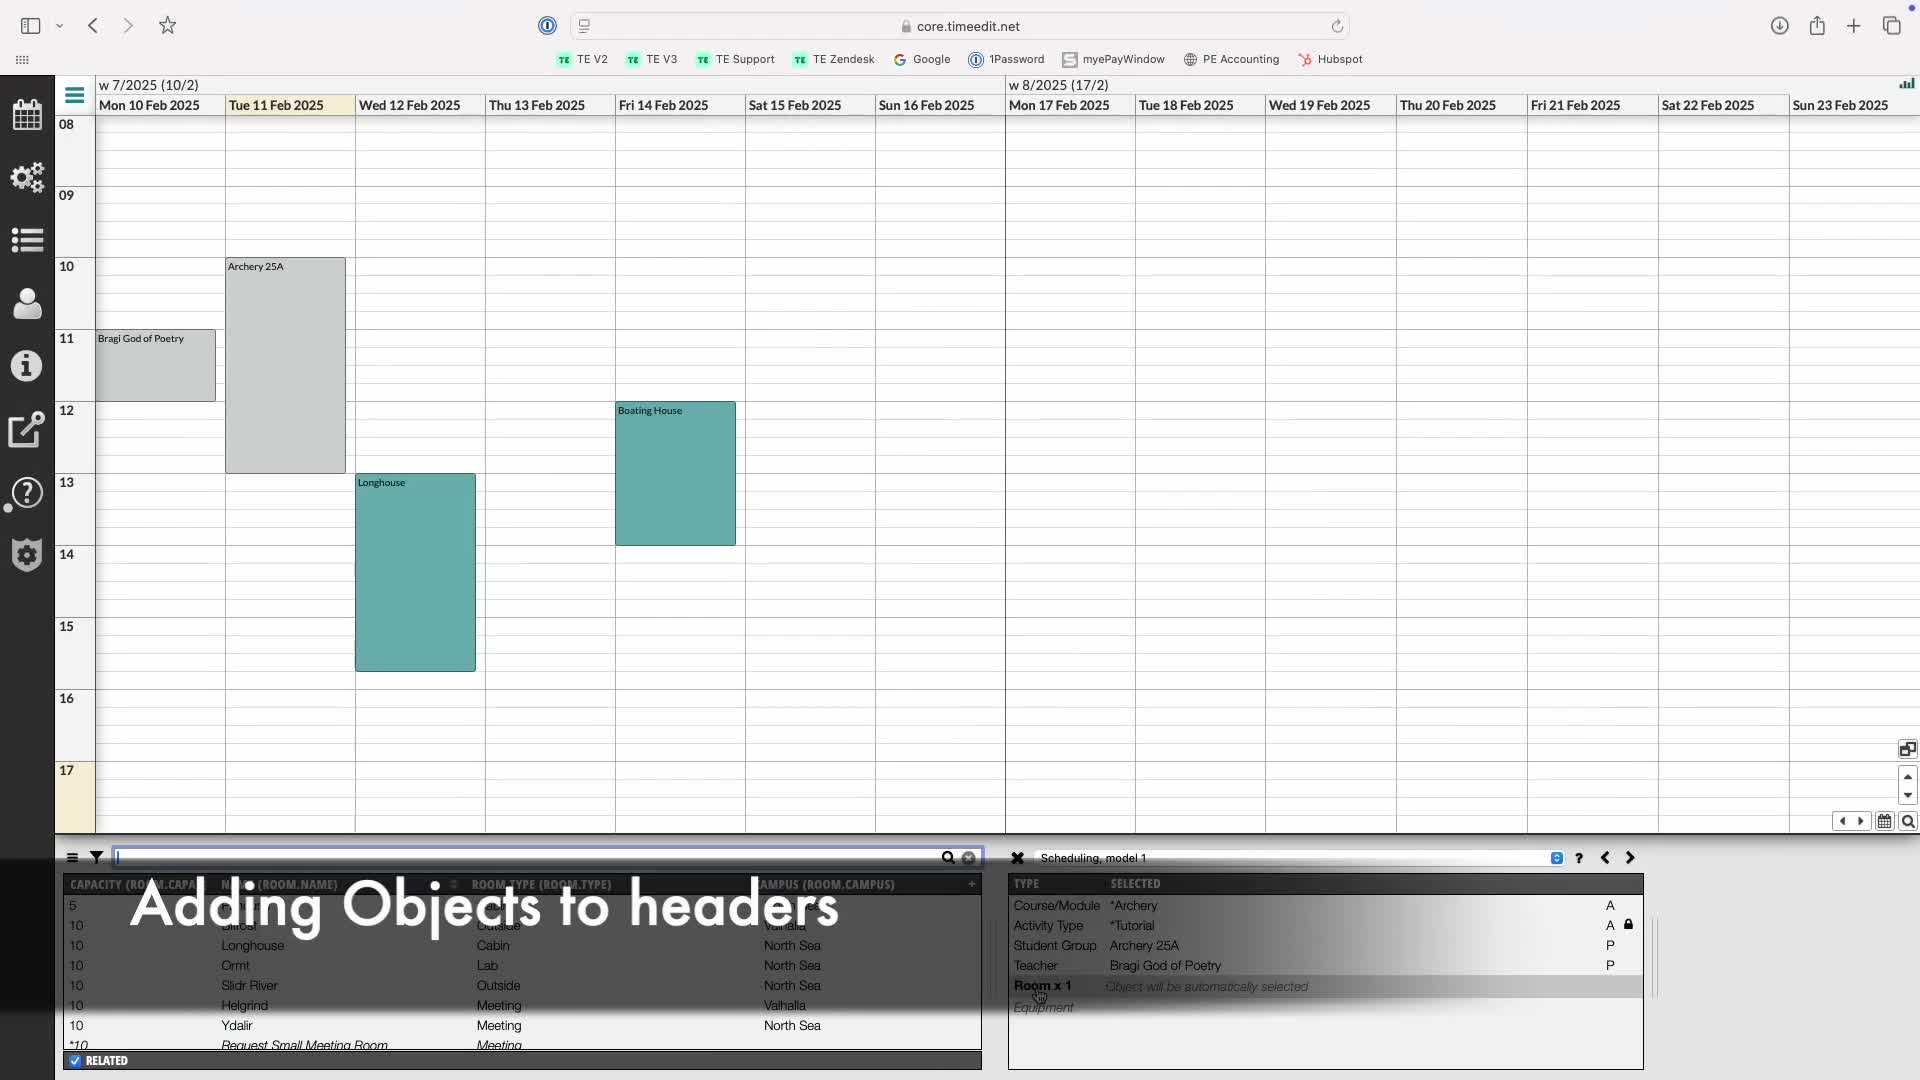
- Drag objects into the header of either axis.
- Adjust settings as needed.
7. Using Multi-Select Tool 2:14
- Enable the multi-select tool in settings to select multiple objects at once.
- Alternatively, drag an object type to add all objects of that type.
8. Splitting the Calendar 2:51

- Right-click the drop-down menu to split the calendar vertically or horizontally.
- Each split calendar can be adjusted independently.
9. Exploring Calendar Settings 3:20

- Each calendar has its own settings, visible when selected.
- Settings are numbered according to the calendar.
10. Utilizing Useful Settings 3:39

- 'Private selected' checkbox: Only populates the selected calendar without affecting others.
- 'Follow date' option: Makes the calendar follow the date of the controlled calendar.
11. Filtering by Object Type 4:06
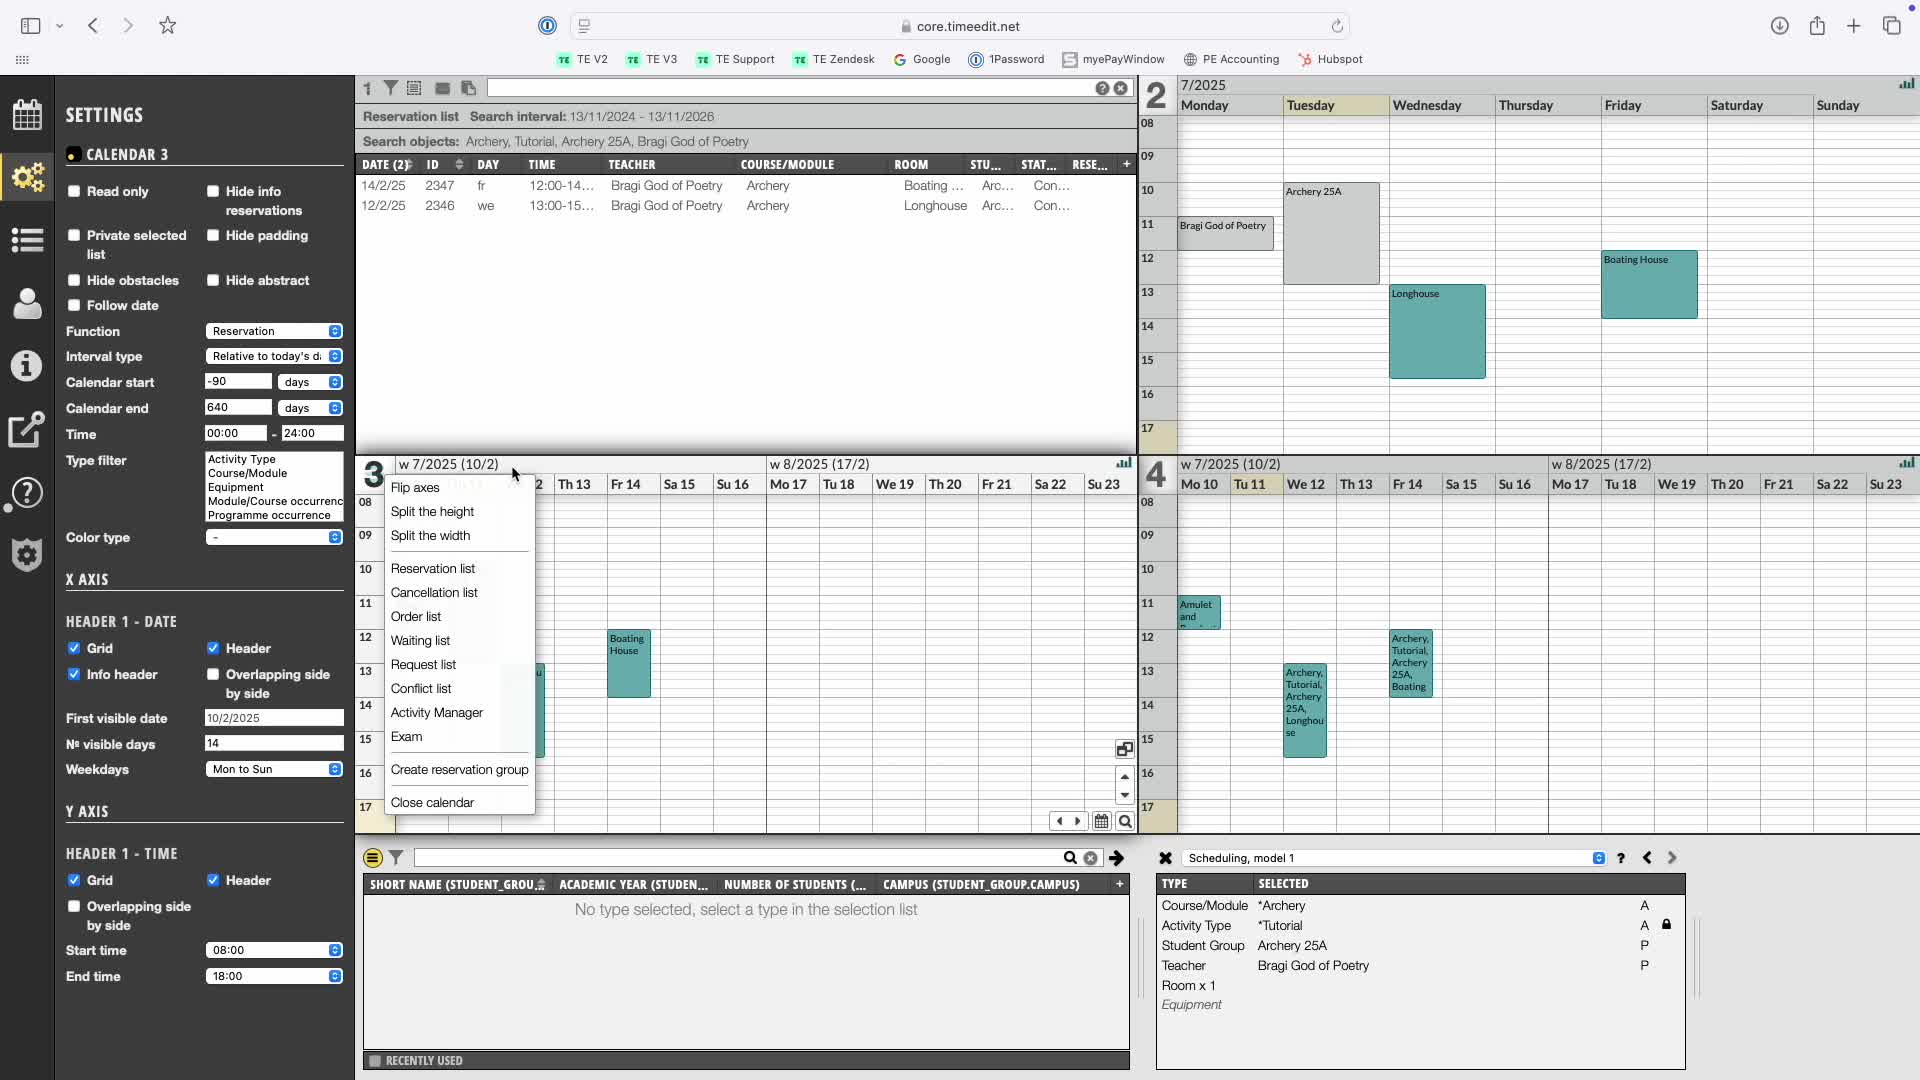
- Use 'type filter' to focus on specific object types (e.g., staff).
- This shows only relevant reservations.
12. Colouring Reservations 4:40
- Select 'colour type' to color reservations by a specific object type (e.g., broom or teacher).
13. Experimenting with Views 4:59
- Combine all settings to create various tailored views.
- Encourage experimentation to find the best views for individual or institutional needs.
Check out our other videos in the series:
- Moving on from CMIS
- Moving on from TechOne
- Moving on from Semestry
- Making a Reservation
- Changing objects on reservations
- Moving reservations
- Cancelling and restoring reservations
- Using the Reservation List
- Virtual objects on Reservations
- Reservation Modes, Data and Conflict Control
- Understanding the colours in Core
- Creating Views in Core
- The Waiting List, Conflict List and Request List